What i should have done today instead of rushing and acting on my emotions:-
a) Set a buy target, place my order, then exit browser
b) Dont change plan unless necessary.
c) Be patient and think rationally
Thursday, June 28, 2012
Tuesday, May 1, 2012
Orange Sky!
I saw something special today. Had a nice lunch with Shiang Peng this afternoon. Got back home in the evening about 5.30pm,, took a nice refreshing bath, turned on my PC to watch "Lost In Translation", a movie i've always wanted to watch a long time ago but only recently started to watch it because of Scarlet Johansson's brilliant performance in The Avengers. "Lost In Translation" turned out to be a very good & entertaining movie seeing a very young Scarlet Johansson playing her confused/lost character brilliantly. Pretty good chemistry with Bill Murray. During this time it started to rain with heavy thunder.
Anyway while watching the movie,I suddenly noticed outside my window that everything turned orange! I was puzzled at first since I've never seen anything like that before. I paused the movie, rushed down and saw outside my house that everything was orange as if it was a whole new world. It was pretty cool and had an atmospheric feeling to it. A rare occurence and it was my 1st time witnessing it. Some kind of a sign to me from above?
This day is definitely a day to remember......May 1 2012 :)
Friday, April 13, 2012


Wednesday, April 11, 2012
Merge Two Images for a Custom Collage - Pretty Cool Trick!
Photoshop How-To: Merge Two Images for a Custom Collage
Few projects have the budget for custom photography. Yet if you use too much stock photography, you may look like everyone else. The solution: Combine photos into something unique using Photoshop.
Written by Jennifer Wills on July 24, 2011
Related Articles
Related Reading
Few projects have the budget for a lot of custom photography. Yet if you use too much stock photography, you risk looking like everyone else. The answer is to merge two or more images into something unique, and the best tool for that is Adobe's Photoshop.
In the following tutorial, I'll show you how to composite individual photographs into a new image. To follow along, merge your own images or download the photos below by clicking on them.
Here are the images to collage together:

"clouds_jwillsphoto" by Jennifer Wills is licensed under a Creative Commons Attribution-NonCommercial 3.0 Unported License.

"frame_jwillsphoto" by Jennifer Wills is licensed under a Creative Commons Attribution-NonCommercial 3.0 Unported License.

"plane_jwillsphoto" by Jennifer Wills is licensed under a Creative Commons Attribution-NonCommercial 3.0 Unported License.
The end result will look like this:

Step 1.
In Photoshop, open the file clouds.jpg or whatever you want as your background image. Then open the other images you'll composite, select the Move tool (shortcut key: V), and click-and-drag them on top of the background photo (or select each image and copy and paste). To help you keep track of what's what, name the layers by double-clicking on each one in the Layers panel and typing in a new name.

Step 2.
Add a layer mask to the plane layer by clicking on its name in the layer panel, then clicking the Add Layer Mask icon at the bottom of the Layers Panel.

Make sure the mask is selected by clicking on it. You can confirm it's selected by looking at the name of the file, which should say "plane, Layer Mask/8".

Make black your foreground color. A good shortcut for this is to hit the "D" key which sets the default foreground (white) and background (black) colors. Then hit the "X" key to swap those colors so black is in the foreground.
Now select the Brush tool (shortcut key: B) and choose a large brush with some hardness. I used a 100-pixel round brush with 85% hardness.
Step 3.
Begin painting out the background of the plane. It will disappear as you paint because, on a layer mask, wherever you paint in black disappears. Wherever you paint in white becomes visible. The old Photoshop adage is, "White reveals, black conceals".

As you get close to the plane, zoom in and reduce your brush size for greater precision. If you overpaint an area, don't worry—nothing has been destroyed. You can restore the detail by hitting the X key to swap to a white brush and painting back in anything you inadvertently made invisible.
For masking a straight line, such as the edge of a wing, click once on an edge of the wing, release, move your brush cursor to the end of the wing, and click again while holding down the Shift key. You've now created a straight line between those two points.

Step 4.
Turn off the visibility of the plane layer and select the frame layer by clicking on it in the Layers panel. Choose the Magic Wand tool (W) and in the Options bar, set the tolerance to 30 and uncheck the Contiguous box. Click the gray background outside of the frame. Now click the Add Layer Mask icon at the bottom of the Layers panel, and this is what you'll see:

Hit Command/Control-I to invert the layer mask, and you should see the cloud background through the frame.
Step 5.
Finally, let's make the plane look as though it is flying through the frame. Turn on the plane layer's visibility and select its mask. (Remember, you have to click on the mask thumbnail, not the plane thumbnail.)
Choose a brush and paint with black on the areas where you want the plane to appear as if it's behind the frame. I painted back the wing on the left and a bit of the tail. The final image should look something like this:
Note: An article with this same title but completely different content appeared on CreativePro.com in 2006. That article was written by Colin Smith.
Sunday, April 8, 2012
Ryan Reynold's Workout and Diet
Ryan Reynolds Workout & Diet
 The question has come up a lot, so I'm gonna give you the detailed version. The first time I lifted a barbell for BLADE was the end of July, 2003. I had to be ready to go by mid December, however when we shot the scenes in question it was January, 2004, so, basically, 5 months.
DIET: I ate something pretty much every 2-3 hours, never "stuffing" myself, but never letting myself get hungry. Tons of water throughout the day... BREAKFAST: 1/2 cup egg whites and 2 eggs. Oatmeal - no sugar, a *protein bar 2-3 hours later. (the best oatmeal is this stuff called McCann's Steel Cut Oatmeal. It takes about a half hour to cook, but you just make enough to last a couple weeks. add apple sauce and cinnamon to improve the taste.)
 LUNCH: chicken and veggies/brown rice. a *protein bar 2-3 hours later.
DINNER: fish or chicken with salad and vegetables. balsamic vinegar for dressing. couple more ** Optimum Whey Protein Shakes throughout the night and right before bed.
Monday, March 19, 2012
the Story of the Stonecutter
I was reading Anthony Robbins' book earlier and it was on the Changing Metaphor topic. His story of the stone cutter caught my interest:-
A Stonecutter would pick up a rock, and with a hammer and sharp object and start hammering the rock in the EXACT SAME position each time (read focus).
Chink. Chink. Chink. No result.
Chink. Chink. Chink and on and on. No result.
The Stonecutter would sit there, often for hours with no VISIBLE result.
Then all of a sudden... the 108th hammer into the rock.. and CRACK!! The stone splits perfectly in half.
This is a great metaphor for life, and particularly your business. Keep Chinking away at that rock, keep the momentum. Even without any visible positive sign. Don't stop. Stay consistent
Friday, March 16, 2012
Anthony Robbins - Awaken the Giant Within
Reading Anthony Robbins' Awaken the Giant Within. Here are some terminology in the book which I find interesting and may wish to refer back in the future:-
Article Source: http://EzineArticles.com/5380
CANI - Consistent and Never Ending Improvement
"The Japanese have a single word for "constant and never-ending improvement" and it's called Kaizen. Kaizen is from the Japanese words Kai and Zen where "kai" means change and "zen" means good. Yes folks, change is good"
Benefits of CANI include:
- Creates a personal and business momentum that will be hard for your competitors to catch up with.
- Personal satisfaction and fulfillment because it will cause you to grow personally.
- Leads to innovation. Innovation creates leverage.
Article Source: http://EzineArticles.com/5380
NAC-Neuro Associative Conditioning
-a technique for greater personal effectiveness. In short, he instructs readers to associate pain with not taking the action that we know we should take, and associate pleasure with taking action.
STEP 1:
Commit to have more pleasure in life and alot less pain.
One of the ways that's kept you from using that is using language that intensifies emotion
STEP2:
Get leverage on yourself . Eg use the following 4 new words to replace old ones:
Bored/Sien to "Need to do more"
Fxxx to "Annoying"
Shit to "Oh my goodness"
If only I had / 'zhong zi' to "No worry. I'll do it different;y next time"
-
RAS - Reticular Activating System
determines what you will notice and what you will pay attention to. To focus and do things that will help to achieve your goal and vision.
"The RAS introduced by Robbins is part of the subconscious mind. It’s a filter, applied to all the enormous data picked up by our senses every moment of our lives. It’s the reason we’re not overwhelmed by sensory perceptions. It’s how we can tune things out.
The Reticular Activation System is always at work, deciding what we see and what we don’t see. And we can control it, to an extent. The RAS reveals to us what we want to see, and veils that which we aren’t interested in. If I enter a room full of things, my attention will be pulled toward whatever is most interesting to me there: a tray of food if I’m hungry; a magazine featuring an article about something I’ve been contemplating; my girlfriend’s face. If you follow me into the room, your attention is liable to fall upon something else entirely. Our raw senses pick up the same data about the same objects, but somehow our focus wanders differently. That’s the RAS in action.
As you expand your interests and turn your eyes toward new things in your world, your RAS opens up and lets more things get through. By learning about new things and being fascinated in new things, you strengthen your conscious mind so that it can handle “more hits” from the RAS. Your consciousness expands to soak up more of your world, and through your eyes, it’s as though the world itself is enriched and enhanced."
Article Source: http://www.xamuel.com/reticular-activation-system/
Sunday, March 4, 2012
End of Detox Program
I have just taken my last Melilea shake for the 7 days detox program :) Ah finally it's over!!! I've only been taking very little amount of vegetables, fruits, yogurt, brown rice and steamed fish and tons and tons of water!
The first time i took Melilea i poured in water at temperature level into the Protein Shaker bottle. Either i shook it too long or the water wasnt cold enough, the liquid in the water turned gel-like solid ! I thought this was normal and so i consumed it. Took me about 5 minutes to force myself to swallow everything as not only it tasted horrendous & almost unbearable, its solid form made it hard for me to chew and swallow. Later that day I asked my friend and he told me it's supposed to be in liquid form when taking it :) Also he asked me to take 1 scoop instead of 2 scoops at a time. Opps!
Yeap the taste was really really bad! The first day was the hardest as not only I had to withstand the growling hunger from my poor stomach, I had to consume something that tasted like Chlorophyll grass 3 times a day! Fortunately, i gotten used to the taste by the 3rd day and now its now acceptable.
It was a difficult experience especially the first few days. For the Day 1-3, i noticed a lot of weird things in the stool. I had the urge to head to the toilet and frequented twice a day. However by Day 4, that slowed down and I started to just go once a day for the big one. The color of the stool changed from a mixed of red and black to just normal. By Day 6, the output was getting lower and lower until the final day.
I believe this 7 days detox program was worth doing as I'm currently feeling great and my mind is more awake than than ever before. Its also good to clear off decades of stuck waste in my digestive system. Will I repeat? Maybe but not this year :) I'm going start eating chicken breast tomorrow!!! Oh how I've missed you!!!!
Sunday, February 26, 2012
Melilea 7 days Detox Plan
I bought a tub of Melilea today which sot RM165. Time to detox my body of toxins which been accumulating for decades.
I'm going to start my 7 days Detox plan starting tomorrow Monday 27th Feb till Sunday 4th Mar. Baically i'll take 2 scoops of Melilea powder 3 times a day as meal replacement for breakfast, lunch and dinner. Not wanting to make it too extreme, I'll still consume other things like fruits, vegetable, oats.
Thursday, February 16, 2012
VCP-510
Ouch today i didnt pass VCP-510. I got 270 points.....and I needed only 300 points to pass!!
It's actually the 1st time i didnt manage to pass a cert exam! Its painful yes but I shall not give up! I will take this exam again next week and pass it!
Life has taught me to never give up no matter how many times you fail. I will succeed!
Sunday, February 12, 2012
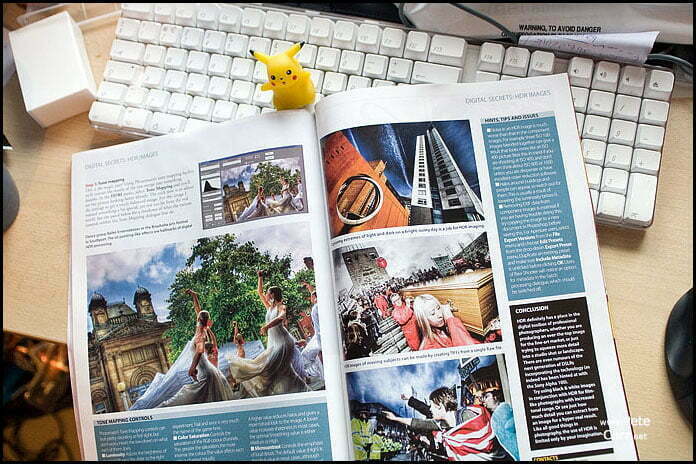
Tips on creating stunning HDRs
source : http://www.vanilladays.com/hdr-guide/
HDR Photography Guide Book
Its finally out. The book based on this guide is available to buy. Why buy it when this guide is free? Well firstly because this guide is nearly 3 years old. Secondly because this guide is around 3,000 words and the enhanced version in the book is 10,000. So its more indepth. Thirdly because the guide in the book is only 1 of 10 chapters. The book has 304 pages of HDR goodness. Lots to read. Landscapes, how to do black and white, panoramas, cross processing, toning, people, moving subjects. Its got it all. You can buy itfrom Amazon US andAmazon UK. Enjoy.
If you want to know how to take photos such as these, then read on.


Contents
- What’s new?
- Aims of this tutorial
- What is HDR?
- Tools Needed
- Step 1: Source Images
- Step 2: Generating a HDR image
- Step 3: Tone Mapping
- Real World Examples
- Issues with HDR
- Extras
- Conclusion
- Credits and Links
What’s New?
Photomatix discount code
You can now use the discount code “VanillaDays” when you buy Photomatix to get 15% off. Put it on when you buy it to use it.
I’ve reorganised this guide to include more on Photoshop’s HDR feature and why I feel that Photomatix’s is better. The latest version of Photomatix will detect if your TIFF’s have the same EXIF info and it will ask you to confirm which images have which exposure settings. This means you don’t have to remove the EXIF from them anymore. A great feature.
This guide has also been featured in the November issue of Professional Photographer. I think that’s an official stamp of approval from the photography industry that HDR is indeed great for photographers world wide. It can produce nice balanced images on harsh sunny days, or it can create arty pictures of already stunning landscapes.


Aims of this tutorial
The main aim of this tutorial is to help people use HDR techniques to produce photos with a higher dynamic range than they normally get in a standard out of the camera photo. I will show you how to take a shot from the one on the left, to the one on the right.


What is HDR?
HDR means ‘High Dynamic Range’. Using software like Photomatix you can create images with a more detail in the highlights and shadows than you can with a normal photo from todays digital cameras. Its similar to the old technique of exposure blending. Taking one photo for the sky and one for the ground, then merging them both together in Photoshop. HDR takes it a step further by increase the amount of detail in the image and allows you to create some unique photos. You can use it carefully to create natural looking photos or you can use it creatively to create atmospheric and emotive photos. The choice is yours as to how you process the end result.
Tools Needed
A RAW editor such as Aperture, RawShooter, or Photoshop. Secondly, the HDR program. I use Photomatix.
Step 1: Source images
There are two main ways to create the source images needed for HDR. You can either use AEB, auto exposure bracketing, on your camera to take 3 images while you are out, or you can use RAW to take 1 image and then use a RAW editor to produce 3 shots back at your computer. I shall start with auto exposure bracketing.
Auto Exposure Bracketing (AEB)
The main advantage with AEB is that you can get better source images with less noise. For example, a sunset. You would normally get really dark shadows and enhancing them later from 1 single RAW file would increase the noise. With AEB you can take a completely seperate image for the shadows and one for the highlights to preseve the detail and keep the noise to a minimum. The disadvantge to this approach is that anything moving in the image will become blurred and repeated as it moves across the 3 images. To start with you will need a camera that has the AEB mode and a tripod. You will also need a tripod so that the 3 shots you take can be perfectly aligned later. Go to the menu on your camera and set the AEB mode to -2 / +2 stops.


It should look like the right image after the changes. Compose your shot, and set the camera up as your normally would to take a picture. Now after you take a picture you will see the exposure compensation level drop down to -2. Take another picture and you will see it goes up to +2. You will notice the shutter speed or aperture changes too. This allows you to get the three shots for the shadows, a balanced image and for the highlights. You now have the 3 shots required to produce a HDR image.
Using a RAW Editor
The other way to produce the 3 shots needed is to take 1 photo and adjust in a RAW editor such as Aperture, Photoshop or RawShooter. The main advantage to this is that you can produce a HDR shot with moving subjects such as people or cars. The disadvantage is that if you use an image with very dark shadows and you’re trying to boost the exposure, the result will be quite noisey.
Load your photo into the editor, then set the exposure level to -2 and save the image as a 16bit TIFF without any metadata such as EXIF info. This is the important part. If you save it with EXIF info you will find that Photomatix relies on that info to produce the HDR shot. The problem with this is that the shutter speed and aperture values will be the same across the 3 images and Photomatix won’t know which image is -2, 0 and +2. Set the exposure level to 0, save that and then set it to +2 and save that image.

This is how it looks in Aperture. You will now have the 3 images needed to produce a HDR image.
Step 2: Generating a HDR image
Open the 3 images into Photomatix. From the HDRI menu select Generate HDR. Photomatix will ask you if you want to use the 3 opened images or load in some. Make sure it has “Use opened images” selected and click ok. Now Photomatix will confirm the exposures for each image. 9 out of 10 times it will get it right, but just incase make sure that each image has the correct exposure settings. In the case of this guide they should be +2, 0, -2. Click ok, then check that “use standard response curve” is selected. If you are using 3 images taken at the scene tick the “Align LDR images before generating HDR image” option just so that Photomatix aligns the images for you. Click ok and after a few minutes you will see your HDR image. It won’t look exactly right just yet. Some areas will be slightly over-exposed and it’ll look odd.
Step 3: Tone Mapping
This is the magic part. Using the Tone Mapping feature in Photomatix will convert your HDR image into something usable. Goto the HDRI menu and select Tone Mapping. You will see how your photo looks more like a standard HDR image. The sky will be nicely exposed, as will the ground. The trick now is to adjust the settings to get a nice balanced image. You could be creative and go for something a little more fun if you feel like it. For the image in this guide I wanted something special and yet not too far from the real world. I’ll start with a quick run down of the various options.
Luminosity
Adjusts the brightness of the shadows. Moving the slider to the right has the effect of boosting shadow details and brightening the image. Moving it to the left gives a more natural look to the tone mapped image.
The optimal value depends on the image and the effect you want to achieve.
Strength
Controls the strength of local contrast enhancements. A value of 100% gives the maximum increase in local contrast.
The optimal value depends on the image and the effect you want to achieve.
Color Saturation
Controls the saturation of the RGB color channels. The greater the saturation, the more intense the color. The value affects each color channel equally.
White Clip – Black Clip
From watching the way the histogram changes, the white clip adjusts the highlight contrast and the black clip adjusts the shadow contrast.
Micro-smoothing:
Basically this setting should be called “How arty do you want your shot?” At 0 you can get the cool arty style HDR images with all the detail in everything from walls to clouds you didn’t know where there. However, if you want a nice simple blended exposure photo set it to 30. 95% of the image should be perfectly exposed as if you spent hours putting them together in Photoshop. This is a great new addition to Photomatix as it allows people to use the software as they see fit. If they want a nice photo that is perfectly exposed then they can get that just as if they used ND Gradient filters on their lens. However, if like me they want something a bit more unique they can drop the micro-smoothing down and get something dramatic.
Light smoothing:
Never set this below 0 as you will get horrible results.
Microcontrast
Controls the accentuation of local details. The default value (High) is the optimal value in most cases. However, this control may be useful in the case of a noisy image or when the accentuation of local details is not desirable (e.g. seams of a stitched pano in a uniform area may become visible when local details are too much enhanced).
Real World Examples
Natural Feel

Settings used;
Luminosity +8, Strength 25%, Colour Saturation 65%, White Clip 0.220, Black Clip 0.075
Natural Feel 2

Luminosity -2, Strength 80%, Colour Saturation 65%, White Clip 2.230, Black Clip 0.490
Being Creative

Luminosity +5, Strength 75%, Colour Saturation 65%, White Clip 4.305, Black Clip 1.140
As you can see, when you increase the strength, luminosity and clipping you increase the visible detail in the image. You can see more detail in the building and the clouds.
Issues
Shooting on high ISO will increase the noise in the image. For example, using ISO100 can produce a noise image like ISO400. So if you use ISO400 it will be very noisy. Don’t even think about ISO800 or 1600 unless you are desperate and have a great noise reduction technique. I find that Noiseware doesn’t do a thing against the noise in a HDR shot, but Noise Ninja can. However using Noise Ninja will soften the image.
Halo effects around buildings and people can occur too. I’ve read that this can be due to lowering the luminosity below 0.
Extras
Generating a HDRI from a single RAW file
Using the latest version of Photomatix, 2.3.1, you can load a single RAW file and generate a HDR image. Simply goto File -> Open and then select the RAW file. Photomatix will load the image and generate a HDR from it. You will still need to tone map the image after. I tried it but I didn’t really like the results. The image was too noisy and had some corruption in certain areas. The best method is still to take 3 bracketed images on site.

1 RAW vs 3 RAW’s
There is a lot of talk on the Web about true HDR images. Lots of people argue that a HDRI from 1 RAW file isn’t a true HDRI. I personally believe that the end result is all that matters. If you sell a print in a gallery is the buyer really going to care if its a true HDR image or a “HDR” image? Are they really that bothered about how many bits of colour there are or just how much data there really is in the image? Probably not. They may ask how you created it out of a passing interest but are they really truely going to care? I doubt they will. They’ll take it home and hang it up and look at the end result. They will enjoy the end result. Its all about the end print in my opinion, not about how nerdy the process was. Out of interest I decided to produce a HDR image from 1 RAW and 3 RAW’s to compare the end result.

HDR from 1 RAW file

HDR from 3 RAW files
As you can see from the photos they are fairly close. There is more detail and better colour in the image produced from 3 RAW photos. The right hand side wall isn’t burnt out like on the 1 RAW image, and neither is the blue wall to a lesser extent. There is also more detail in the sky and the whites aren’t as grey. Things like this can corrected to a certain extent in Photoshop so I wouldn’t worry too much. I did find that reducing the “Colour Saturation” for this image in the “Tone Mapping” settings did produce a nicer shot. There was more detail in the blue sections and the wall on the far right wasn’t burnt out as much. For the most part the images are similar and it does show that a 1 RAW HDR image can produce a striking result. It may not be a true HDR shot and its not a Low Dynamic Range image but what it can be is a stunning photo with a little effort.
Photoshop vs Photomatix
With Photoshop you can create a HDR image from 3 RAW files very easily. Simply open them in PS, goto File -> Automate -> Merge to HDR. It’ll ask you where the source images are and then generate the HDR. It will then display the image on screen so you can adjust the histogram to make sure the image isn’t overly dark or too blown out. Once you have done that goto Image -> Mode -> 16 or 8 bit and it will bring up another dialog box. From the drop down select “Local Adaption.” Using this you can tweak the levels in the image. You have to be careful as it can cause the image to look horrible. The end result will be a well balanced image that you can further edit in Photoshop. The results are quite natural looking and don’t feature any of the extreme looks that a lot of HDR images do. For more information read this excellent guide on Photoshop’s HDR feature.

You can achieve a similar result using Photomatix. Convert the RAW files to 16bit TIFF’s and generate a HDR image using this guide. Once in the Tone Mapping interface set the strength to 1, Micro-smoothing to 30, luminosity to 0, light smoothing to 0 and micro-contrast to 0. The image will then be similar to Photoshops. I found that Photomatix’s result was brighter in the shadows, but this was before playing with the “Local Adaption” feature in Photoshop. The benefit of Photomatix over Photoshop is that you have far more control over the end image. You have control over the luminosity, micro-contrast, light smoothing, micro-smoothing, etc. So you have the ability to tweak the image further than you can in Photoshop. How far is up to you.

As you can see they are virtually the same. However, using the features in Photomatix you can create stunning pieces of art like the following;
HDR from JPGs
I’ve ran a test using my dancer image and it seems that you can get just as good a result using 3 JPGs instead of 3 TIFFs. Its probably better to use TIFF’s as they will store more detail, but if you want can use JPGs well enough. There is a definite difference in using JPGs and TIFFs. I prefer the TIFF look. JPGs seem more saturated and noisier.

Removing EXIF
This is now redundant as the latest version of Photomatix, 2.3.1, will now detect if the EXIF info is the same and will ask you for confirmation on the various exposures of each shot. However if you need to you can use these tips to remove the EXIF. If you’re having trouble removing the EXIF from a TIFF I’ve found a couple of things you can use. You can copy the TIFF into a new document as save it. Useful when you don’t want the lossiness of save for web [eg PSDs or TIFFs] and you can create an action to do it as a batch function. There is also a program called, IrfanView that can supposedly edit EXIF.
For Aperture users, when you export versions click on the export preset drop down, then edit presets. If you select the full size TIFF or JPG preset then click + it will duplicate that. Then make sure that “include metadata” is unticked and click ok.
Conclusion
So that just about wraps up my HDR guide. I hope you found it interesting and a starting point for your own HDR images. Some people see HDR as just another fad but I really believe that it could have plenty of real world applications. I’m already exhibiting a couple of my shots in Liverpool. It definitely has its uses, but as with everything too much of a good thing can be bad for you. Feel free to check out my other HDR photos.
Credits and Links
Thanks to stollerdos for directing me to this great tutorial on HDR that explained the single RAW file trick.
- Luminous Landscape Photoshop HDR Tutorial
- High Dynamic Range Workshop
- How to create professional HDR images using Photoshop
- HDR from 1 JPG
- The Definitive Guide to Realistic High Dynamic Range Images
- How to Create High Dynamic Range Images
- Modern HDR photography, a how-to or Saturday morning relaxation
- NatureScapes: The HDR Landscapes Tutorial
Subscribe to:
Comments (Atom)